
Hello there. In this blog post, this guide can show you how to beat the bosses in Story Mode, as well as the levels containing them. Alright, with the rather short introduction out of the way:
1-G, THE BAR[]
This level contains several G03LMs, which are rather hard to kill.
For this level, you'll want to be playing as Sanford, as he holds the hook, which will never break, and can be thrown to not only attack enemies from afar, but also bring them in to make it easier to kill them. And it always comes back to you. This will be especially useful in rooms with G03LMs, as they can have their helmet knocked off in around 5 hits with a weapon.
You'll want to play on Easy difficulty so all firearms come with extra clips, since in the several last rooms, other than the boss room, enemies will only be holding bottles, which not only deals low damage, have an extremely short range, it also breaks in 7 attacks/blocks. 7. {TABLE FLIP}
THE G03LM MK2[]
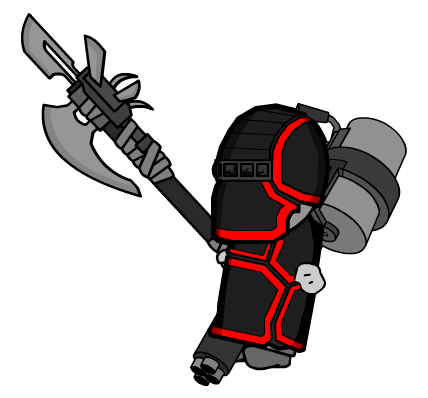
This boss, accompanied with badass music, is very hard to kill.
Sanford is useful in this battle, as, to compensate for the hook's short range, never breaks. Plus, you don't have to pick it back up every time you get punched in the face by the G03LM.
However, it will take a very long time to knock off the helmet, and while swinging your hook at the bastard, you will also have to be fighting various kinds of members of the A.A.H.W., wielding firearms and actually useful melee weapons.
By time you knock off the G03LM's helmet, there should be plenty of firearms littered on the battlefield. So you just have to pick up one, aim at the helmet-less giant's exposed head, and start making bullet rain.
1-H, THE NEXUS H.Q.[]
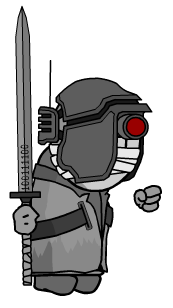
There are two ways to do this level: The easy way, and the high holy hell hard way. You will, of course, start with the easy way: Using Hank.
It's rather easy with Hank, on all three difficulties. You just have to pick up the binary sword in the safe on B-1, next to the "EMPLOYEES ONLY" door. Then you can use whatever firearms and WOOPEE!
If you are going for the "Do What Comes Natural" medal, however, then it is very hard.
Here are a few tips for getting the almighty medal:
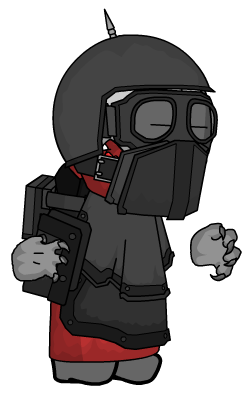
For this level, you will want to use Deimos. Since, not only can he wield two weapons (Sanford's Hook can't come off), he also starts with an MP7 and Beretta 92, both of which have decent ammo capacity. (Sanford starts with the Glock 20.)
While using Deimos, DO NOT USE MELEE WEAPONS, EXCEPT ON G03LM FLOORS. Deimos is at his best when using firearms, trust me.
When the guns he has have their ammo deplete, only pick up weapons with full clips. You'll need as much ammo as possible.
Also, ignore weapons that can't hold 13 rounds or more. (Unless it's the Desert Eagle from the locker on B-2.) Trust me.
If you have to backtrack to get weapons with full clips, do it. It may be tedious, but it will keep you alive longer.
If someone has an M-249, freaking use it. It doesn't matter if it has some rounds missing, it can contain 200. You won't have to fire any other firearms until the M-249's magazine depletes.
MAG AGENT: N[]

This will be hard, on all 3 difficulties, and with all 3 characters.
In Mag Agent: N's first form, he will be a towering monster, and will be firing his mag-sized PPK at you. In the first phase, you have to fire at the Mag like a maniac, while also taking note of the enemies coming out of the actual towers, and you will have to dodge all of the enemies' special attacks.
Even after N falls down, the battle is not over yet. He takes out another PPK, and starts firing at you while on the floor, and enemies continue to come out of the towers. This phase is easier. You just have to get a powerful melee, and start attacking him in the back. He can't fire at you, and enemies seem to have a problem doing so as well. Just keep attacking, and eventually, he will die.
1.5-C, THE MUTO-LABS[]
This level is sprawling with abominations, so you have to be careful. The abominations are dangerous in both forms. In the first form, they can knock you down easily, and the second form grabs you, and, unlike the zombies, pierces the TAC-Bar and pounds on you until your health depletes.
You'll want to stay as far away from the abominations as possible, so just use firearms. Thankfully, there will still be agents and riot guards to supply you with plenty of guns. Just make sure you are on easy mode.
MAG AGENT: GESTALT[]

Mag Agent: Gestalt is rather difficult. You'll be wishing Dr. Hofnarr stayed with you. He is a towering beast with strong armor, and can knock you down like the Mk2 G03LM. The method of defeating Gestalt is quite similar, however.
His armor can be broken. You just have to shoot at it until it fully breaks. Both armors can be broken by shooting, so just shoot at the head armor. After it breaks, continue shooting until it dies.
Just make sure to keep note of the agents, riot guards, and abominations on the battlefield as well. Even though the agents and riot guards will be trying to shoot down Gestalt as well, you shouldn't rely on them to do that. Plus, you'll need more ammunition to use against the abominations.
1.5-F, THE SOLARIUM[]
The final level of Episode 1.5. Make sure you're on easy mode.
This level is not very different from the other levels, except you have the halo and it's powers throughout the entire level.
Make sure to preserve your magic for the boss at the end. But, if you really want to disintegrate things, don't worry, there is an Auto9 somewhere in there.
PHOBOS[]
A rather hard boss if you are not prepared. And not on easy mode.
If you preserved your magic for the boss, you can just zap the jackass until he dies, and kill off the remaining enemies. But, if you didn't, you are in for hell.
While Phobos is wielding the binary sword, you'll want to ignore him and kill the small ones, since he can deflect virtually any bullet you throw at him. Not just block, deflect.
When he switches to his TMP, though, you can shoot at him. (Or, if you killed enough bad guys, just zap him.) You'll have to take note of the enemies coming out of both doors, especially the undead.
When he switches back to his sword, focus on the enemies until he switches back to his TMP. Repeat.