|
This article is in need of some cleanup. Look into spelling, grammar and formatting. |
During the course of Madness Retaliation, players will encounter several types of Enemies who will attempt to impede their progress. Knowing the general capabilities and threat provided by each type will greatly improve your chances of survival.
For the uninformed, here is a list of abbreviations relevant to the list:
- HP: Hit/Health Points; how much damage a character can take before dying.
- AC: Armor Class; percentages of how hard it is to hit a character. Can be halved by using melee weapons, and some special weapons outright ignore it.
- AP: Action Points; spent to move or attack.
- Max AP: the maximum amount of Action Points a character can have at one time. Without any special gear, every character starts at 5 AP.
- AP Regen/Gain: how many Action Points a character gains at the beginning of each turn. Without any special gear, every character gains 3 AP each turn.
Grunts[]
Standard Grunt
The first enemies encountered in the game are your basic, run-of-the-mill grunts, and they're about as tough as you'd expect: not very. They don't have any special gear to protect them, have a paltry 3 Hit Points, lacks Armor Class and Character Class (CQB, Assault, and Heavy classes - meaning they can't get less AP bonus for using certain types of weapons) to speak of, and carry weapons that are similarly weak - most carry lower-end melee weapons (Combat or Trench Knife) or pistols (Glock 17 or Beretta 92). They are only threatening at the very beginning of the game, when the player characters aren't much better equipped, and thus serve as a means of easing players into the basics of Madness Retaliation.
All but the weakest weapons are capable of killing a Grunt in one blow - unfortunately, your characters happen to be carrying said weapons when you have to deal with your first few fights. The best means of mitigating damage at this point is to use handguns to pick off any Grunts in range, and then letting the rest advance into attack range (oftentimes, they won't even get a shot off) before repeating the process. After some armor and longer-range weapons are found, you can have your best-armored character (hopefully one of your Close-Quarters Combat specialists) advance to draw the Grunts' fire while the rest of your team picks them off.
"Advanced" Grunts[]
An Advanced Grunt wearing Amber Shades and Bandages.
Although Grunts are quickly supplanted by more powerful enemies, a few rooms feature what could be considered an "upgrade" to the most basic of the AAHW's minions. These "advanced" Grunts wear some basic armor and headgear, like the "Fur-Lined Shirt" or the "Bandages", and occasionally carry surprisingly powerful weaponry, like the Desert Eagle, sub-machine guns (MAC-10 or Heckler & Koch), or shotguns (sawed-off shotgun or Mossberg 500). They also tend to appear in massive numbers, alongside a few more dangerous enemies.
By the time you encounter these Grunt variants, you should be sufficiently equipped to destroy them in one shot (or less, if you've got something with splash damage); their gear lacks any AC, AP, or AP gain bonuses, and the HP boost is minimal (2 points at best). They should only be a priority if you can't hit the more dangerous enemies that accompany them or if they're carrying a strong weapon of their own.
1337 Agents[]
1337 Agent
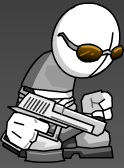
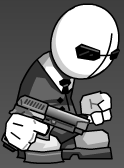
Your first 1337 Agents begin appearing after you've fought through several roomfuls of Grunts, wearing their usual black shades and matching suits. The ensemble gives them higher HP than the Grunts (5 points), as well as an AC of 2, giving them a small chance of blocking attacks. They tend to be equipped with higher-end melee weapons (machetes or hand axes), pistols (Beretta or Desert Eagle), and SMGs.
Agents are not much tougher than Grunts, but the small block percentage tends to kick in at the worst possible times. Your best bet early on may be to pick off the surrounding Grunts before focusing on the Agents, or using a low-cost weapon to wear them down - if you manage to get someone into melee range, they'll go down with even less chance of blocking the fatal blow.
Advanced 1337 Agents[]
After you venture into the depths of the facility with the Level 1 Keycard, you'll start seeing 1337 Agents with red-tinted shades (dubbed "Terminator Shades"). These Agents have much higher HP (10 Points) and AP Gain (+5 points each turn) than the garden-variety 1337s you've been fighting, and their weaponry is usually on the higher end of the scale as well - most carry SMGs or shotguns.
They are usually found amid groups of regular 1337 Agents and Grunts, and are often hard to reach on your first turn, while the increased AP Gain can be surprisingly potent, since they will regularly perform actions each turn. Until you can secure strong weapons, you can treat them as particularly strong 1337s, but don't underestimate them.
Elite 1337 Agents[]
These somewhat redundantly named Agents are no laughing matter - in fact, they are arguably the first truly difficult enemy type you will encounter. Pairing their "Terminator Shades" with a "White Tuxedo" is both stylish and functional; in addition to even higher HP (15 points), they now have an AP Gain of 7 (ironically, 2 points higher than their Max AP). Also near the end of the game, these agents will gain an additional HP boost (giving them an overall 20 HP) to increase their difficulty.
They carry weapons similar to their lesser variants, but occasionally bring a Steyr AUG rifle into the fray, giving them a long-range attack (7 spaces for 5 points of damage) that pierces through armor. Also unlike previous enemies, these agents have character classes similar to your own, potentially allowing them to use their weapons even more frequently. Although their AC is no higher than the basic 1337 Agents, they also seem to be extremely prone to blocking attacks you really don't want them to.
If you don't have armor-piercing weapons of your own, Elite Agents can be a serious pain. The best strategy early on is to pick off their weaker allies before going after them, and keeping a good rotation of healthy and injured characters so you can heal the latter while the former draws the Elite Agents' fire. If necessary (usually after a series of blocked hits), a Smoke Grenade or Flashbang will hopefully provide the opening you need to do in the agents, or at least get in a position to strike.
Mag Agents[]
Only encountered in the later rooms of the facility, these large fellows are super-sized versions of 1337 Agents, ranging from basic Agents to Elite Agents (the latter are the most common). Armed with anything that their smaller forms could use (although most prefer pistols), their only statistical difference from other agent variants is that their HP is twice as high as the variant they are based on, putting them in the range of 20-40 HP.
Despite their size, they're often lower-priority enemies, serving mainly as meat shields for more fragile units. Stunning them is an effective means of taking them out of the fight while you deal with their weaker but more damaging allies - once the Mag Agents are all that remain, pick them off with your various weapons (although armor-piercing ones are the most efficient, due to their AC of 2).
Sniper Agents[]
Three of these agents are only present in one (optional) room in the entire facility, this variant on the Elite 1337 Agent trades the "White Tuxedo" for "Deimos' TAC Jacket" and carries a lethal Steyr AUG rifle, befitting their Heavy class. For some reason, while the jacket gives +1 boost to Max AP and the range of its gun, it doesn't reduce the agents' health as it is supposed to; the agents instead possess 48 HP, even higher than their magnified variants. These stats, coupled with their +5 AP Gain, the armor piercing shots of their AUG, and the powerful enemies accompanying it, the Sniper Agents can quickly mow down your characters if allowed to fire a shot.
If you have long-range weapons with stunning properties (the JHP Ammo, or the Sanford's Hook/Sanford's Head combo), stunning these Sniper Agents first may be the best course of action. If you have ample Smoke Grenades or Flashbangs in stock, using them every turn is another possibility to ensure that the agents don't get a chance to attack while you whittle away their supporting enemies.
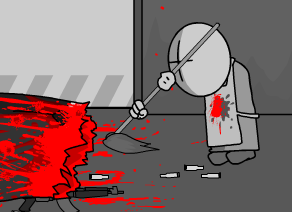
Zombies[]
The classic undead monsters of the Madness Combat series begin appearing in the depths of the facility, with their first appearance being in the "Zombie Underground", a poorly-lit tunnel leading through abandoned locker rooms, showers, and massive cages where the zombies were likely stored. They are not terribly dangerous (even in large numbers), but they are a fair bit different from the regular minions you've fought so far.
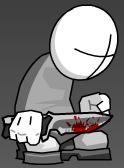
Zombies have higher HP than living grunts - the basic version has 12 HP, whether or not its tattered clothes are stained with blood. Their attack strategy is to simply get in melee range to start slashing your characters with their claws. Said claws are essentially Combat Knives, it deals 3 damage, halves armor, and costs 1 AP (regardless of their Character Class - which zombies don't have). This combination is only threatening due to the "Bloodlust" bonus provided by the Zombie Head; if a zombie kills a character, it automatically regenerates all of its AP. If this bonus activates, a single zombie can cause heavy damage to your squad - and zombies are never fought alone.
When dealing with a group of zombies, exploit their weaknesses: no AC and an inability to attack outside of melee range. Use ranged weaponry to pick off as many as you can without moving from your starting position, and then allow the rest to advance before repeating the process. You'll find your first shotgun shortly before entering the Zombie Underground, and it's highly effective if the undead are clustered together near your starting position (as they tend to be after they advance on their turn). When the horde is picked down to one or two stragglers, you can even send your CQBs against them if you're short on AP for ranged attacks.
Dark Zombies[]
About midway through the Zombie Underground, you will encounter zombies wearing "Dark Tatters" instead of the standard rags. These Dark Zombies are far more resilient than their regular selves (18 HP and 2 AC, giving them a chance to block), but are otherwise unchanged from the regular undead - they still attack with their claws, and they still get the "Bloodlust" bonus if they score a kill.
In general, Dark Zombies can be handled like regular zombies but thanks to their higher HP and AC, they're more likely to survive their trek into melee range. It's a good idea to get your healthiest characters up front just in case they do manage to get an attack off - for added security, a smoke grenade works wonders. Melee attacks are more useful for getting around their armor, but be sure to prepare for the possibility of the zombie's survival to avoid losing more HP than you have to.
Zombie Agents[]
At the end of the Zombie Underground, you'll start to see zombies wearing "1337 suits" or "White Tuxedos" and carrying actual weapons (or, alternately, you can consider them 1337 Agents with zombie heads). These "Zombie Agents" act similarly to Elite 1337 Agents, but with lower AP Gain (+5) and higher HP (18); unfortunately, as the Elite 1337s have too much AP Gain for their Max AP to begin with, the Elite Zombie Agents are unhindered by the drop.
Normally, Zombie Agents can be fought like slightly more durable versions of 1337 Agents; pick off the ones with more dangerous weapons first, or save them for last while you defeat the less durable/armored enemies around them. However, any Zombie Agents with melee weapons should be prioritized over all other enemies whenever possible - between their "Bloodlust" ability and the high-end melee weapons they tend to carry (mainly Machetes and Fire Axes), they can devastate your team in one turn alone, especially in groups.
Mag Zombies[]
Just like 1337 Agents, zombies have a magnified variant that appears in the late-game areas of the facility. These massive zombies have equally massive HP (usually around 50s, but can reach as high as 62), and often wear fairly decent armored gear such as the "A.T.P. Combat Jacket" (HP boost, AC 2, AP Gain boost) or "Assault Armor" (Even higher HP boost and AC 3). This combination makes them extremely tough to kill, and even though their offenses are usually limited to the basic claw attack used by their smaller brethren, some mag zombies in optional rooms tend to carry powerful weapons such as shotguns instead of claws.
By the time you battle these massive monsters, you'll have hopefully discovered ways to stun your enemies, which will enable you to disable these beefy foes and focus your AP on more dangerous enemies while they totter around. If they block your attempts to stun them, a grenade may be in order, especially if they're still backed by numerous other enemies.
A.T.P. Agents[]
The next level of A.A.H.W. personnel appears in rooms sealed by Level 2 locks, and grows increasingly common in the lower levels of the facility (strangely, without their trademarked yellow blood). They have the most variants of any enemy class in the game, and are far deadlier in battle than anything else in the game (barring bosses). They wield nothing but the best weapons, up to and including the 316 Sword, S&W 500, machine guns (Bren gun or M60), and SMGs equipped with JHP Ammo (giving them +2 attack power and the ability to stun). On the other hand, they frequently drop Medkits and grenades upon defeat - handy, since you'll be using them liberally in the later stages of the game.
The basic A.T.P. Agent wears an "A.T.P. Combat Jacket" and their signature face mask (called "A.T.P. Mask" in-game), boosting all of their stats. They always have classes suited to their weapons, reducing the AP they use for each attack. With 16 HP and 4 AC, as well as 6 AP and +4 AP Gain, they are both fairly durable and deadly.
By now, however, you're probably armed with some armor-piercing weapons of your own; when possible, turn these attacks on the A.T.P. Agents while your regular weapons are used on the less advanced minions. Weapons that hit multiple targets are also useful; if you attack multiple agents at one time, the chances are in your favor that at least one will take damage.
TAC Agents[]
For reasons unknown, some A.T.P. Agents wear an "Advanced TAC Mask" instead of their regular headgear, which will reduce their AC to 2 and their Max AP back to 5, with no apparent gain in return (unless the "TAC Scan" ability works for your enemies too). However, they are somehow twice as durable as normal A.T.P agents (32 HP), and compensate for the lost stats with serious firepower - TAC Agents always carry a rifle or a machine gun, giving them very high damage output when combined with their Heavy class and +4 AP Gain. They are usually limited to one per room, always at or near the back, and always with a large group of other A.T.P. Agent variants.
Given their relatively lower AC, higher HP, and lethal firepower, TAC Agents should be stunned as soon as possible, seeing as its high health may prove difficult to be killed quickly. However, be careful so that attacking the TAC Agent does not expose you to damage from the other enemies.
Bullet Agents[]
This variant of the A.T.P. Agent replaces the "A.T.P. combat jacket" with the "Ammo and Camo" gear, reducing its HP and AC in order to gain an extra point of Max AP (which means they have 12 HP, 2 AC, 7 AP, and +3 AP Gain). Generally, they should be prioritized for actual killing instead of stunning, since their durability is quite a bit lower than the average A.T.P. Agent.
Knife Agents[]
Similar to the Bullet Agent, the Knife Agent sacrifices the armor bonus of the "A.T.P. combat jacket" for another gear - in this case, a "Vest and Knife Belt" that increases its AP Gain by 2 (leaving them with stats similar to Bullet Agents, but with 6 Max AP and +5 AP Gain instead). This makes it more of a long-term threat, as its increased AP recovery will provide more attacks over time instead of an initial boost. Luckily, it shares the weaknesses of the Bullet Agent, and can thus be defeated fairly easily - stun more durable foes, but take down the Knife Agent outright before it can exploit its added AP Gain.
Armored Agents[]
The opposite of Bullet and Knife Agents as they trade AP potential for added durability; namely, "Assault Armor" that gives it 32 HP and an AC of 5. They are very hard to kill and block attacks very often, but standard procedures apply: pick off weaker foes and whittle them down (preferably with armor-piercing attacks), and try to stun them until you can finish them or their frailer allies off.
Armored TAC Agents[]
Only seen in the battle against The Clown, these A.T.P. variants are essentially Armored Agents with "TAC Masks" instead of "A.T.P. Masks". They have lower stats (32 HP, 3 AC, 5 Max AP, and 3 AP Gain) than the Armored Agent, but their high-end weapons make up for it, and their main role is to serve as backup for Tricky. Exploit their weaker AC and pick them off before you go after the clown.
Savior Agents[]
Although you won't find them until well after you beat the Savior (and even then, most of them hide in optional rooms), these A.T.P. variants are almost as tough as the real deal. Their Heavy Chestplates give them 28 HP and 6 AC - higher than anyone else excluding the Savior himself, allowing these agents to negate about half of your attacks. They only have 6 Max AP and no AP Gain bonus, but they possess 1 AP reduction bonus to the costs of using rifles and shotguns regardless of their Character Classes (the "Heavy Mastery" bonus). If that wasn't bad enough, Savior Agents occasionally come in large groups, and alongside other A.T.P agents.
These extremely dangerous enemies can nonetheless be defeated with basic combat strategies - which, if you've gotten this far, you should already have a great grasp on. However, weapons that can reduce or ignore AC are recommended against Savior Agents, simply to bypass their massive chance of blocking your regular strikes.
Clowns[]
These psychotic followers of Tricky are mostly found in Club M, the south-west corner of the facility on the map. Their main gimmick is the ability to explode upon death, dealing various chaotic effects that hinder your characters or aid their allies.
See here for an in-depth look at the types of clowns seen in the game.
Saucy Clones[]
An extremely bizarre enemy type resembling Saucy from one of Krinkels' non-canon animations, you'll only see these oddballs in the final battle against the Auditor. See here for details on how to deal with them.
Bosses[]
At various points in the game, you'll find yourself in a boss fight - usually immediately before or after securing an important item. They can usually be given away by the colored glow around the doorway leading to their rooms - or, in the case of the final battle, the unique nature of the room. In order, the major bosses of the game are:
The Savior: Defends the Level 2 Keycard.
4 Mag Zombies: Attack after the players grab the Level 3 Keycard.
The Clown: Protects the Level 4 Keycard.
The Auditor: Sends his remaining forces after the team to stop them from retrieving the DNA Vials. This fight also includes the only appearances of the Saucy Clones and the AAA Clones in the game.
See here for the strategies and equipment of each boss, and here for information on the final battle.